GTM Setup Via Custom Code
From Wiki
GTM Setup Via Custom Code
About this Guide
This guide was produced as an example of the steps that could potentially be followed to implement custom tags for the Awin tracking code into Google Tag Manager and as a method of demoing such an implementation. The variables, triggers and tags also do not reflect a finished implementation.
Awin will not claim any responsibility for programs that suffer as a result of the use of Google Tag Manager and does not claim to be able to provide full support for the platform.
Extra assistance may be found on the Google Tag Manager Community Pages {1}
Accounts
In order to access Google Tag Manager, you must create a Google account. This can be done from the Google search page. Once you have this account, you must then navigate to the Google Tag Manager Login page and click “sign in”.
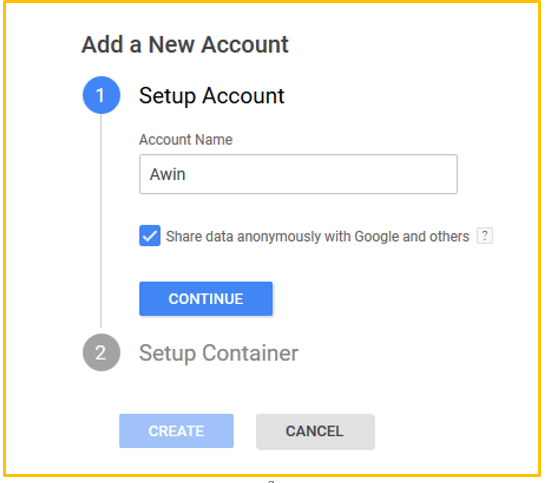
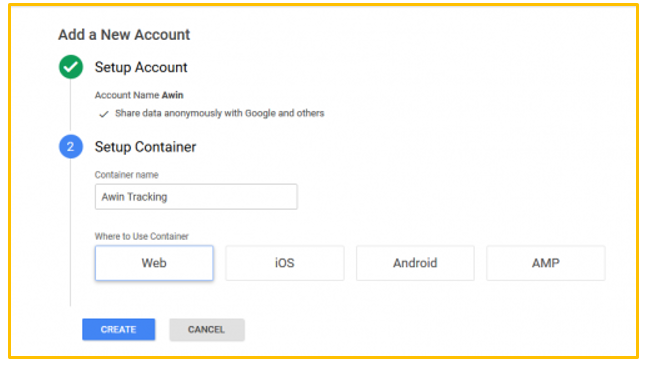
Once signed in, you will be directed to the “Get Started” page where you will create your first Google Tag Manager account. Next you will be prompted to set up a Container for this new account. So far we have created two accounts: 1. Google Account; 2. Google Tag Manager Account. In the below example, the Account Name is ‘Awin’ for demonstration purposes. Please set this to your desired account name.
Container
A Container holds your Google Tag Manager implementations together. Multiple containers can be created in a single Google Tag Manager account.
Container Name Apply an appropriate name for the container.
Where to use Container We will be conducting a web page implementation.
Implementing the Container Code
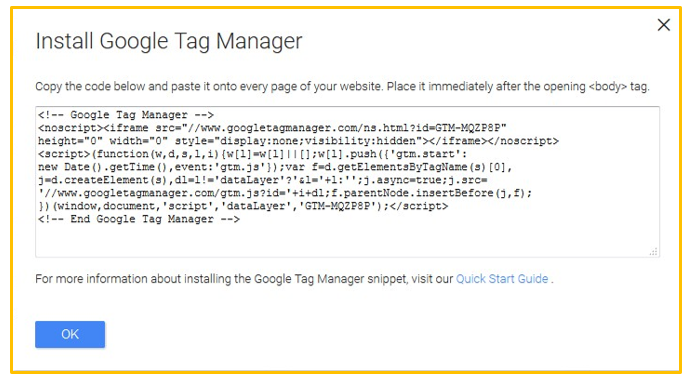
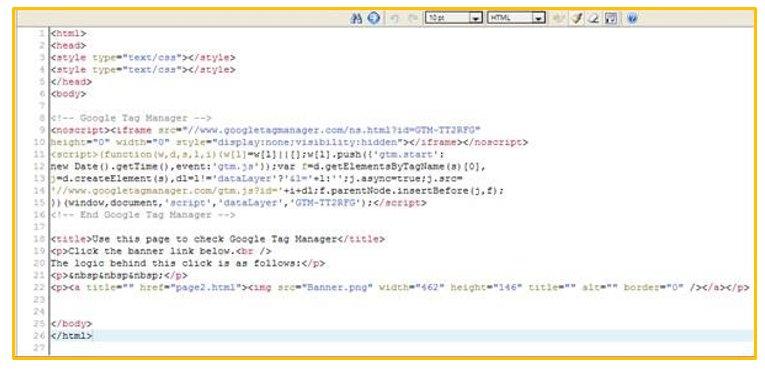
In the next screen you will be asked to accept the terms and conditions and then you’ll be supplied with the container tag code. This code needs to be implemented on every page of the website (including the confirmation page) as close to the opening <head> tag as possible {2}. You can copy this code now and place it on your site or you can continue and add it later.
Variables
Variables are populated inside of Google Tag Manager via code added on the confirmation page. By clicking on the “Variables” button, you will see that some variables are already created by default but you will need to create new variables for this implementation.
Click the “new” – “User defined variables” button to get started.
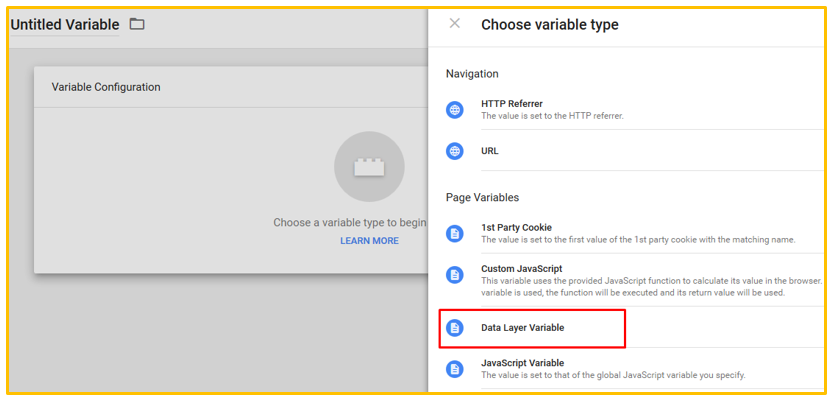
You will be asked to choose the type of variable, select ‘data layer variable’ from the list:
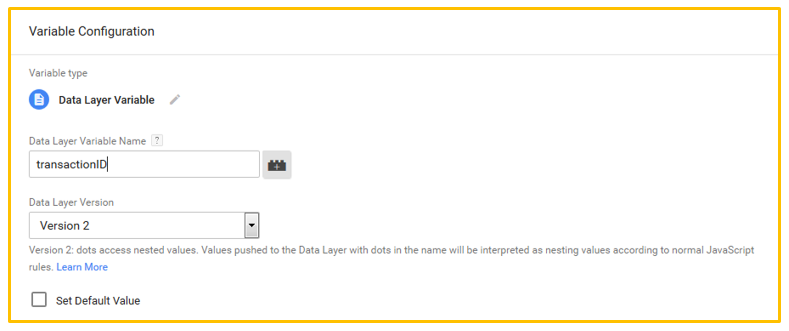
Enter the data layer variable name and click ‘save’:
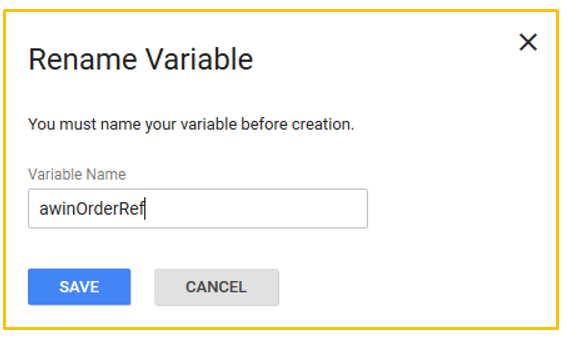
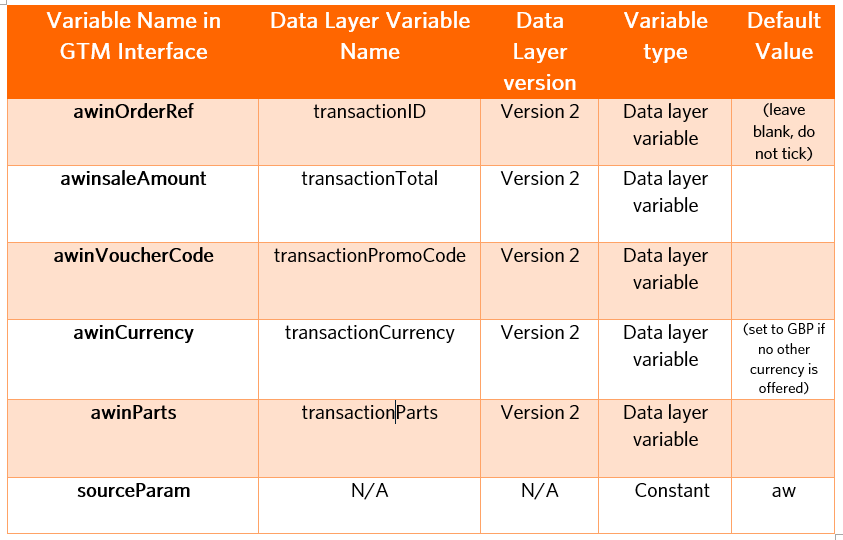
If not done already, you will then be prompted to name your variable, please name the variable in accordance with the table on the next page and click the “Save” button.
Repeat this process with the information from the table on the next page.
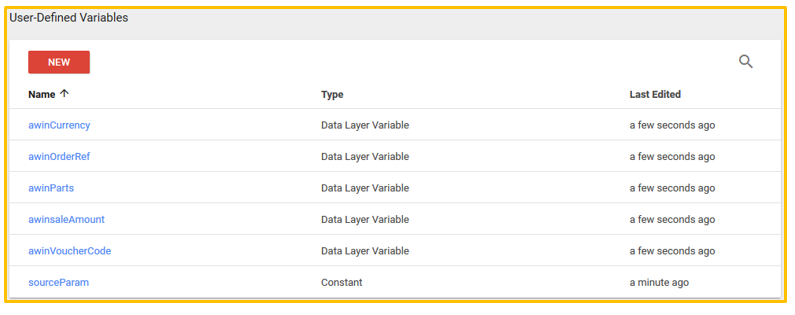
On completion you should see the same values in your variables table as below:
Triggers
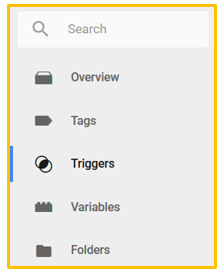
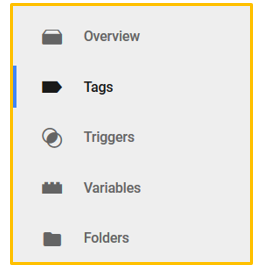
Select the ‘Triggers’ column in the left hand menu bar
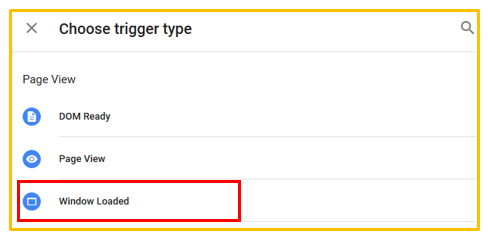
The rules created here can be used to trigger the firing of the Tags stored in Tag Manager. Click the “NEW” button to get started. Then select the Trigger Configuration box; select ‘Window Loaded’ and click continue.
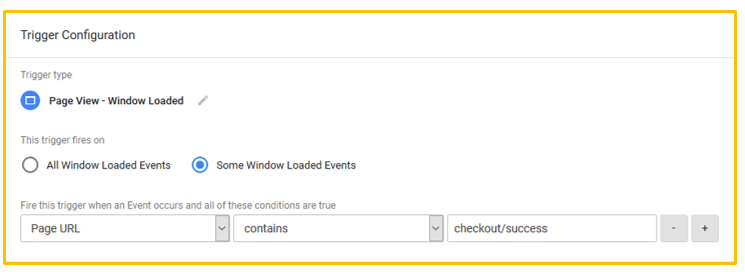
Leave the trigger type as ‘Page View – Window Loaded’. Click ‘continue’ and select ‘Some page Views’.
The trigger being created will fire the tracking tags whenever a user reaches the sale confirmation page. To do this set “Page URL”, “contains” and “checkout/success” (select the appropriate page name from your site).
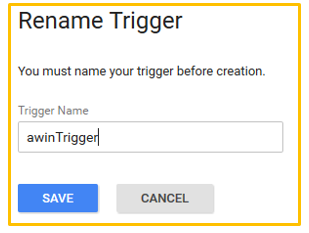
Click ‘save’ and you will be asked to rename the trigger, here add an appropriate trigger name e.g. ‘awinTrigger’.
Click ‘save’ and now you should have the variables and triggers in place.
Please note: You may already have triggers that allow tags to fire on the confirmation page. If that is the case then you don’t need to create new trigger and can just use the ones you already have created
Tags
Tags are snippets of any code a user may want to fire based on certain conditions. In this case, it is the Awin Tracking Code.
The Awin Google Tag Manager plugin allows you to enter the variables names without altering the code. (Please click here for guide). However, a custom HTML setup will be needed for more complex features (e.g. Product Level Tracking).This guide will allow you to create custom tags for Awin tracking and will also enable you to set up ‘Product Level Tracking’ if desired.
Conversion Tag
Select the ‘Tags’ column in the left hand menu bar
Click the ‘NEW’ button and you will now have the opportunity to create a new tag
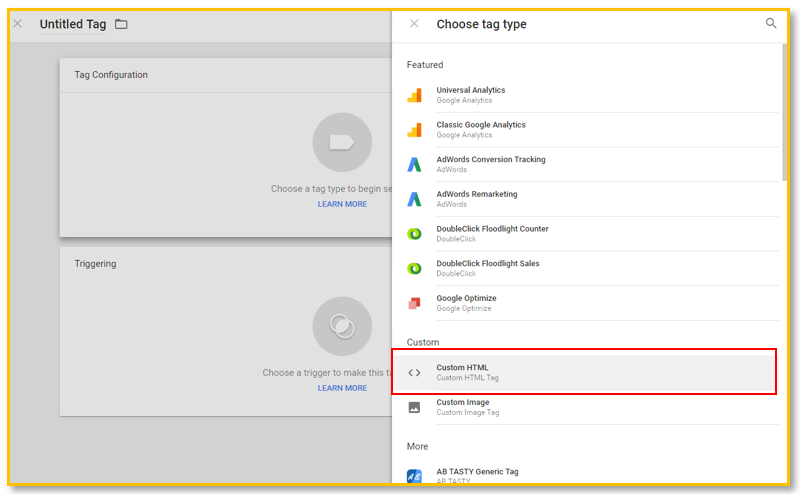
Click the ‘Tag Configuration’ box and select ‘Custom HTML’ as the tag type. This will allow you to set up the conversion part of the tracking code.
Now paste the code provided by your tech contact.
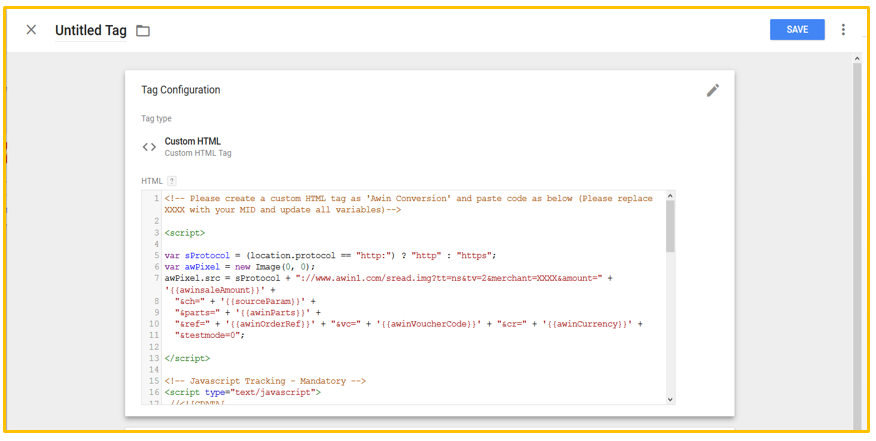
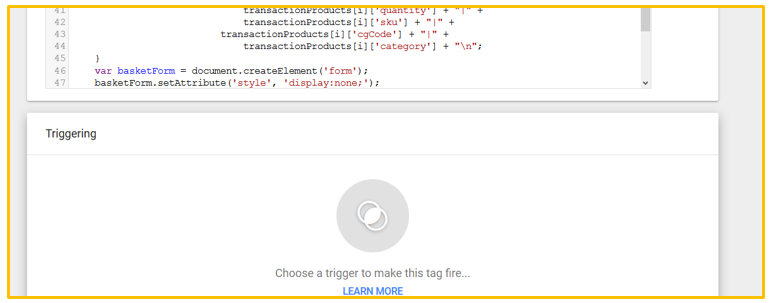
We will need to add a trigger to define when the tag should fire. We only want this tag to fire on the confirmation page so select the trigger you made earlier. Click the box named ‘Triggering’.
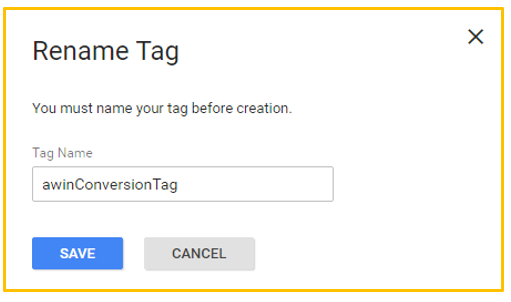
When finished, click ‘SAVE’. You will then be asked to rename the Tag, give it a meaningful name e.g. awinConversionTag.
MasterTag (Journey Tag)
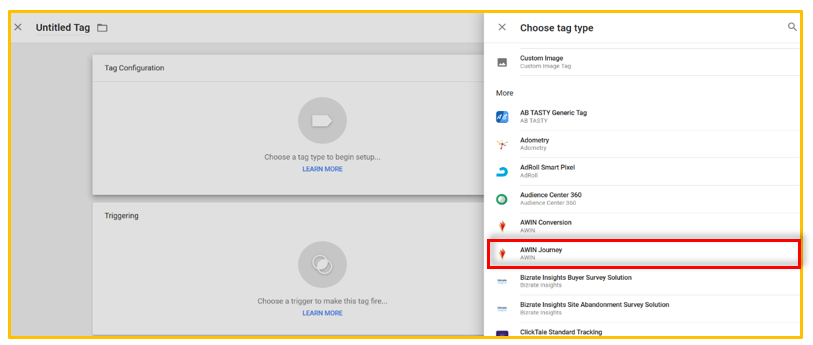
The MasterTag (Journey Tag) needs to be set up to fire on all pages except the confirmation page. Click ‘New’ and select “Awin Journey”.
Enter your assigned merchant ID.
The journey tag must be globally triggered once on all pages. This can be achieved by adding a new trigger. To add this trigger, click the box named ‘Triggering’. Now select the ‘All Pages’ trigger.
It is necessary to add an exception rule to prevent the Journey tag from being triggered on the confirmation page. This is because the Journey Tag is already included at the bottom of the Custom HTML code snippet so that it is set to fire on the confirmation page.
To add an exception for the journey tag not to appear on the confirmation page so you will need to select the “awinTrigger” set up previously.
To do this, click the “ADD EXCEPTION” button and select the “awinTrigger”
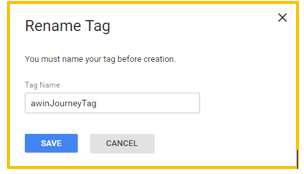
Save the Tag and name it ‘awinJourneyTag’
You should now have the Tags listed in the Tags table with the correct firing triggers.
Implementing the data layer Variables on website
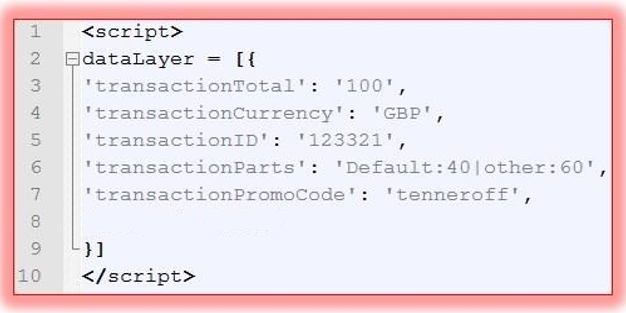
Now that all the variables are created on the Google Tag Manager interface, it’s time to match up the code side in the website. On the confirmation page just before the Google Container Tag, implement the code shown below:
Note: Anything to the right of the colons is where the website sale variables need to be inputted. For demo purposes, these fields are being parsed with generic values. Any VAT or delivery charges need to have been added/subtracted by this point.
Parts Parameter
Commission groups can be utilised to attribute the whole or parts of the transaction to a specific commission percentage or amount. The groups themselves are created and maintained within Commission Manager in the Awin interface.
This must be passed through within the tracking tags so the system processes the transaction correctly.
Commission Groups
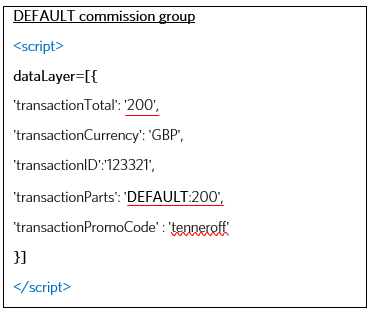
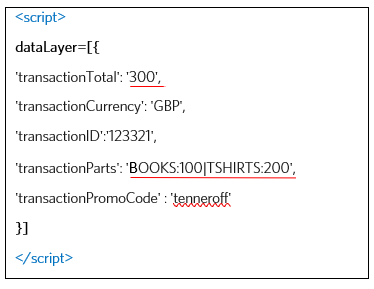
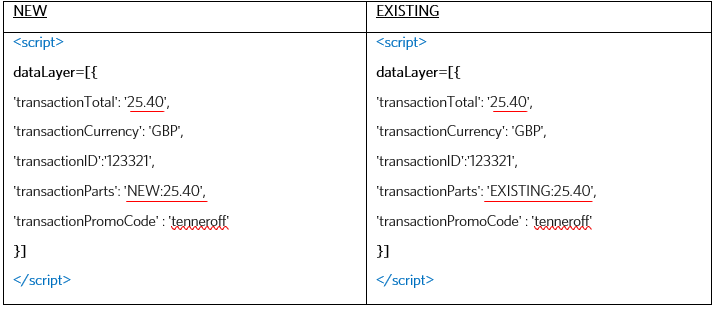
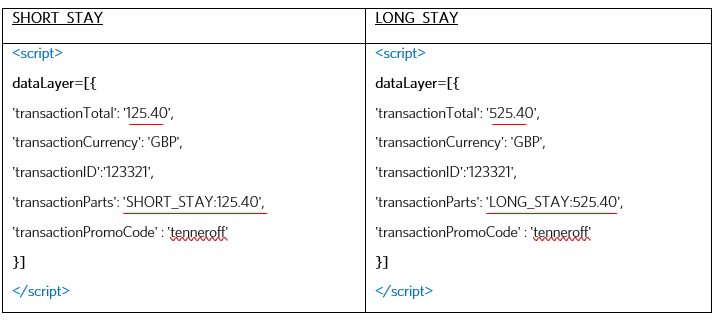
The transactionParts format should be ‘Template:CommissionGroupCode:Template:TotalAmount’
The commissionGroupCode must be replaced with the actual commission group that you wish to attribute the transaction to.
The totalAmount must be replaced by the same amount passed back within the awinsaleAmount variable in the Custom HTML Tag.
Typical examples:
Flat-rate commission
Commission based on new and existing customers:
Commission based on product types:
Multiple Commission Groups in a single transaction
It is possible to split the transaction into parts which each gets assigned to a separate commission group. Do this by populating each part separated by a pipe ("|") character.
 The total sum of the amounts within transactionParts must be equal to the transactionTotal amount.
Please note: You may already have data layer variables that identify the product or customer type. If that is the case then you don’t need to create new variable and can pass through the one you already have created.
Product Level Tracking
This section concerns Product Level Tracking (PLT). If you haven’t opted to implement PLT, please skip this section.
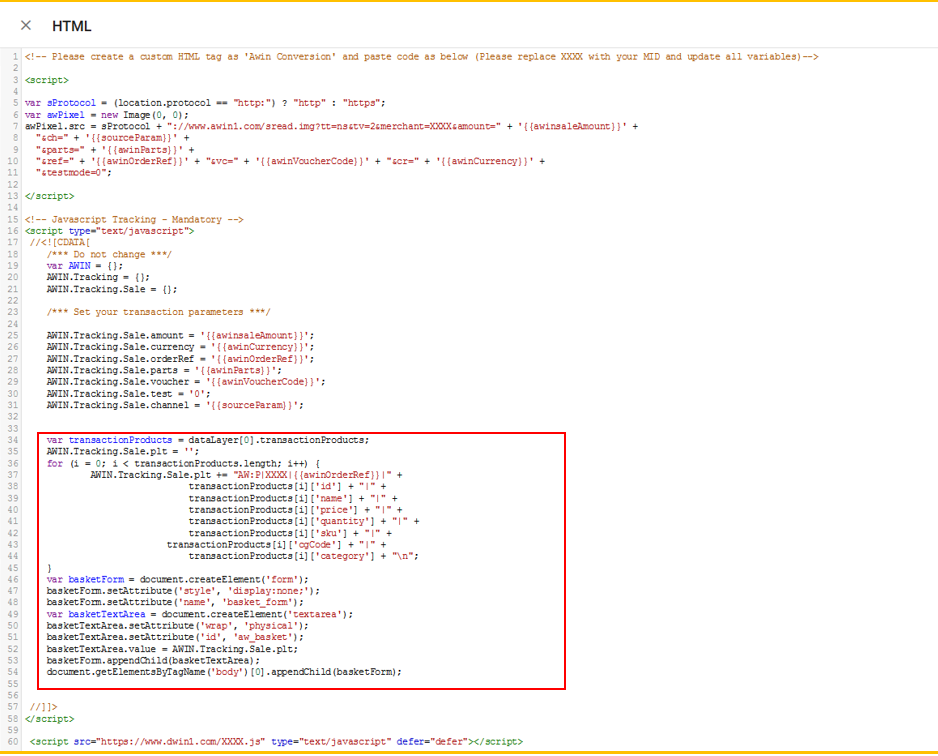
The code outlined in red below executes the Product Level Tracking aspect of Awin tracking.
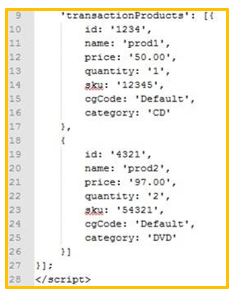
For product level tracking you will need to add additional product information in your data layer.
Add your item info into the data layer in the format shown below (An array of objects where each object is a basket item).
The example here has two products - please note that all values inside of the ' ' are placeholder/example values.
Note: Site logic needs to be built for the transactionProducts array.
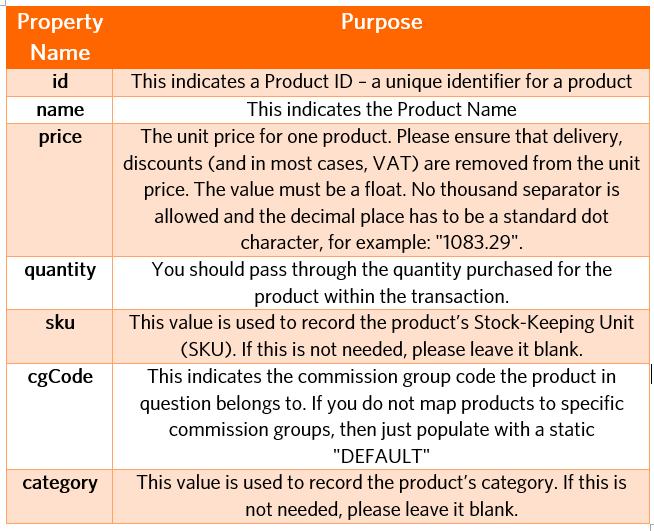
Transaction Products Properties
Versions and Testing
When you have implemented all of the required functionality into the Tag Manager interface, click on the arrow next to ‘publish’ button in the top right of the interface, scroll down and click the “Create Version” button.
You can click the ‘Preview’ button to preview and debug the current version before setting it live. While this option is selected your website will have an overlay which will tell you when each tag fires to aid with debugging.
When you are ready to set the code live and start tracking, hit the “Publish” button to set the tags live.

