Creating a Publisher Profile
From Wiki
Revision as of 08:33, 8 September 2020 by Mirjam Eden (Talk | contribs)
Contents |
Creating a Publisher Profile
The Overview Tab
Adding a full business description
- Click on Profile
- Make sure the Overview tab is selected
- Mouseover the text underneath Description and click here
- Enter a fully detailed description of your Publisher business
- Click on the tick icon to save
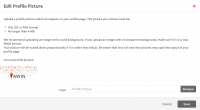
Uploading a Profile Picture
- Click on Profile
- Click in the grey image box over your company name
- Select a picture to upload by following the on screen instructions (Note: A profile picture can be a picture of you, a screenshot of your website or a logo if you prefer). Then click Save
Adding Links
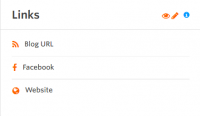
- Click on the Pencil icon in the links box to start editing
- Enter a website, blog URL and Twitter username to add these links to the the Links box
- Click Update Contact Details to save
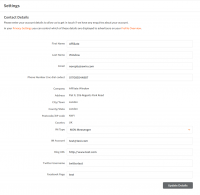
Adding contact details
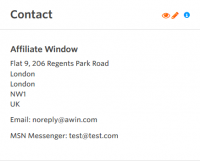
- Click on the Pencil icon in the Contact box to start editing
- Here you can add or change your email address, mobile phone number and instant messenger contact details as you require
- Click Update Contact Details to save
The Documents Tab
Uploading a document to your profile
- In your profile - go into the Documents tab
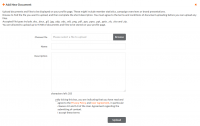
- Click Browse and choose the file you wish to upload - making sure the format matches one of those accepted
- Add a name to the file in the Name field
- Provide a description so that Advertisers wishing to look at the file will understand what they are looking at
- Click the checkbox to agree to the Privacy Policy and User Agreement
- Click the Upload button
- Once a document has uploaded it will appear in a list on the Documents Tab and can be viewed at any time. Other Publishers cannot view these documents.
The Promotional Spaces Tab
Adding Promotional Types
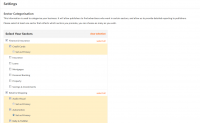
- To add a Promotional Type to your profile, start by clicking on the pencil symbol on the line beneath the tab
- On the page that follows, select any promotional types that are applicable to you, making sure to specify a Primary Promotional Type
Adding a URL to your profile
- Once you have selected your promotional types, save your changes and return to the Promotional tab in your Profile
- Enter your website URL
- Enter a description of your website
- Select which sectors you will be promoting on the website
- Select any key Advertisers you may be promoting
- Click Add to save your changes
Performance Tab
- This section of our interface is still under construction
RSS Tab
- This tab is so that you can add your own RSS feed to your profile
- Enter the URL of the feed and then click Add Feed to save your changes
Additional Functions
Updating Address Details
- To update your address in your account - click on Settings
- Click on Account Contact
- Update your details as required
- Click Updated Details to save your changes
Upload your Company logo to your account
- Click/hover on the
 to bring up the settings menu.
- Click on Logo
- Click Browse and select the correct image file
- Click Upload File to save this to your profile
- Note: The account logo will need to be an 88x31 GIF, JPG or PNG
Updating Payment Details
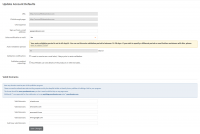
- To update your bank account / cheque payment and VAT registry details in your account - click on Settings
- Click on Payment
- If you are VAT registered select Yes from the dropdown box - otherwise choose No
- You will need to provide your VAT registration number and registration date
- We are unable to pay VAT to businesses not registered in the United Kingdom
- Select whether you wish to be paid by BACS, cheque or International Wire Transfer and update your details as required
- Click Update to save your changes
- All updates take 24 hours to be validated
Changing your password
- Click on the

- Click on Update Password under the Personal Settings subheading.
- Enter your old password and then your new password in the two empty fields
- Click Update Password
|
Do we not have what you are looking for? |


